


Greek koulouria/simitia - braided bread rings
Πολίτικα σιμίτια/κουλούρια

Published originally on my blog on 7 November 2012
Η συνταγή είναι και στα Ελληνικά παρακάτω!
If you've ever found yourself walking the streets of Athens on an early morning, then you might have happened upon a vendor selling the famous Greek koulouria Thessalonikis otherwise known as simitia.
These small, sesame-crusted bread rings are sold on street corners and bakeries and are the breakfast of choice among the busy Athenians who hurry on their way to work with nothing more than a coffee in their belly. We Greeks are not big on breakfast but when you see these bread rings in front of you, there is no room for resistance.
Before moving to the Netherlands, I have never thought of making simitia myself. There was no point to it since I could go to my neighborhood bakery and get one whenever a craving would hit. Now, things have changed. Now, whenever I crave something from home, I have to make it myself.
Simitia are a common snack and street food for both Greeks and our neighbors, the Turks. They were brought to Greece by Greek refugees from Asia Minor and Constantinople (Istanbul) who settled in Thessaloniki, the second largest city in Greece, which explains why simiti is also called 'Koulouri Thessalonikis'. Koulouri/κουλούρι (plural: koulouria/κουλούρια) means small round-shaped bread ring.
The Greek word simiti/σιμίτι (plural: simitia/σιμίτια), comes from the Turkish word simit, which comes from the Arabic word semid, which in turn comes from the ancient Greek word semidalis/σεμίδαλις (simigdali/σιμιγδάλι in modern Greek), meaning semolina.
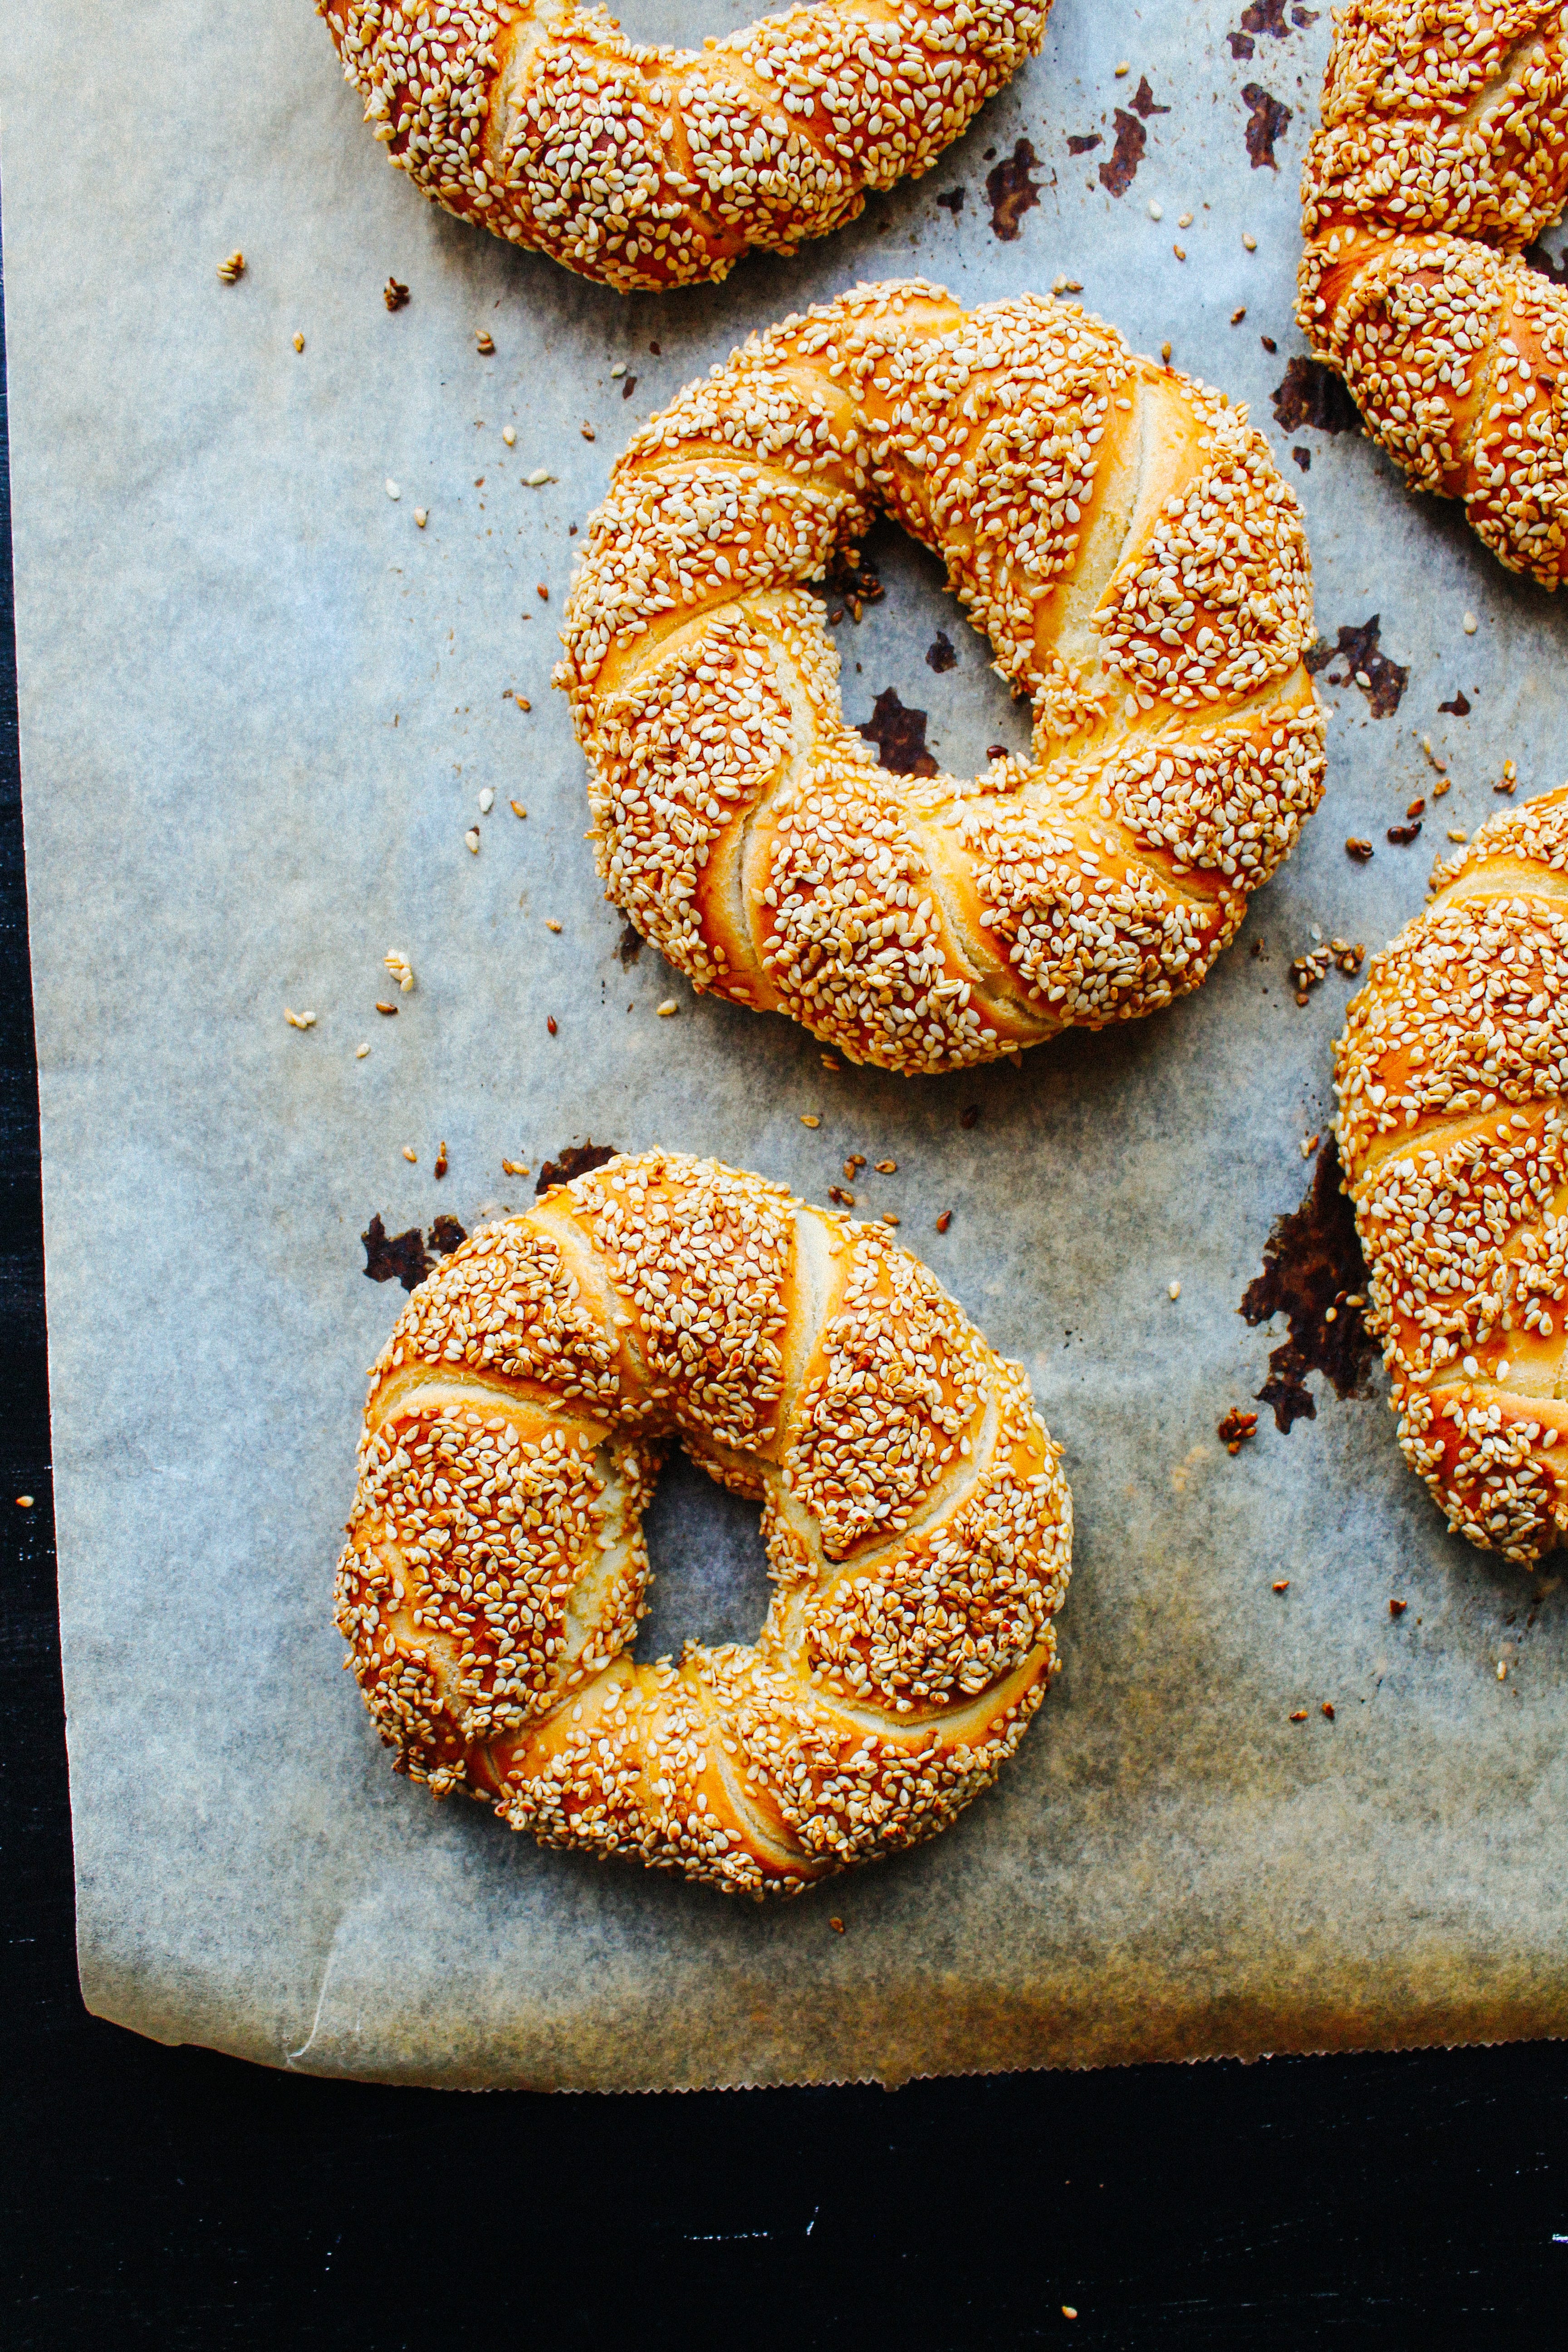
The traditional Greek version of koulouri/simiti is a thin bread ring encrusted with sesame seeds. The one I prefer eating and making is another version, the Politiko simiti (Politiko refers to the type of Greek cuisine I grew up with, of which you can read all about here), one that originates from the Greek bakers of Constantinople. It's a braided, fuller version of a bread ring, that is first coated with a generous amount of petimezi (Greek grape-must syrup/grape molasses) that gives them a light sweetness and then with toasted sesame seeds.
The braiding creates a more intricate texture and thus a more interesting flavor as the delicious petimezi sneaks in the crevices of the braids, creating a light caramelization when the bread ring bakes in the oven. The toasted sesame seeds give the bread a more intense, nutty taste and the addition of eggs and milk in the dough, another difference between the plain Greek simiti and this one, gives it a richer flavor.
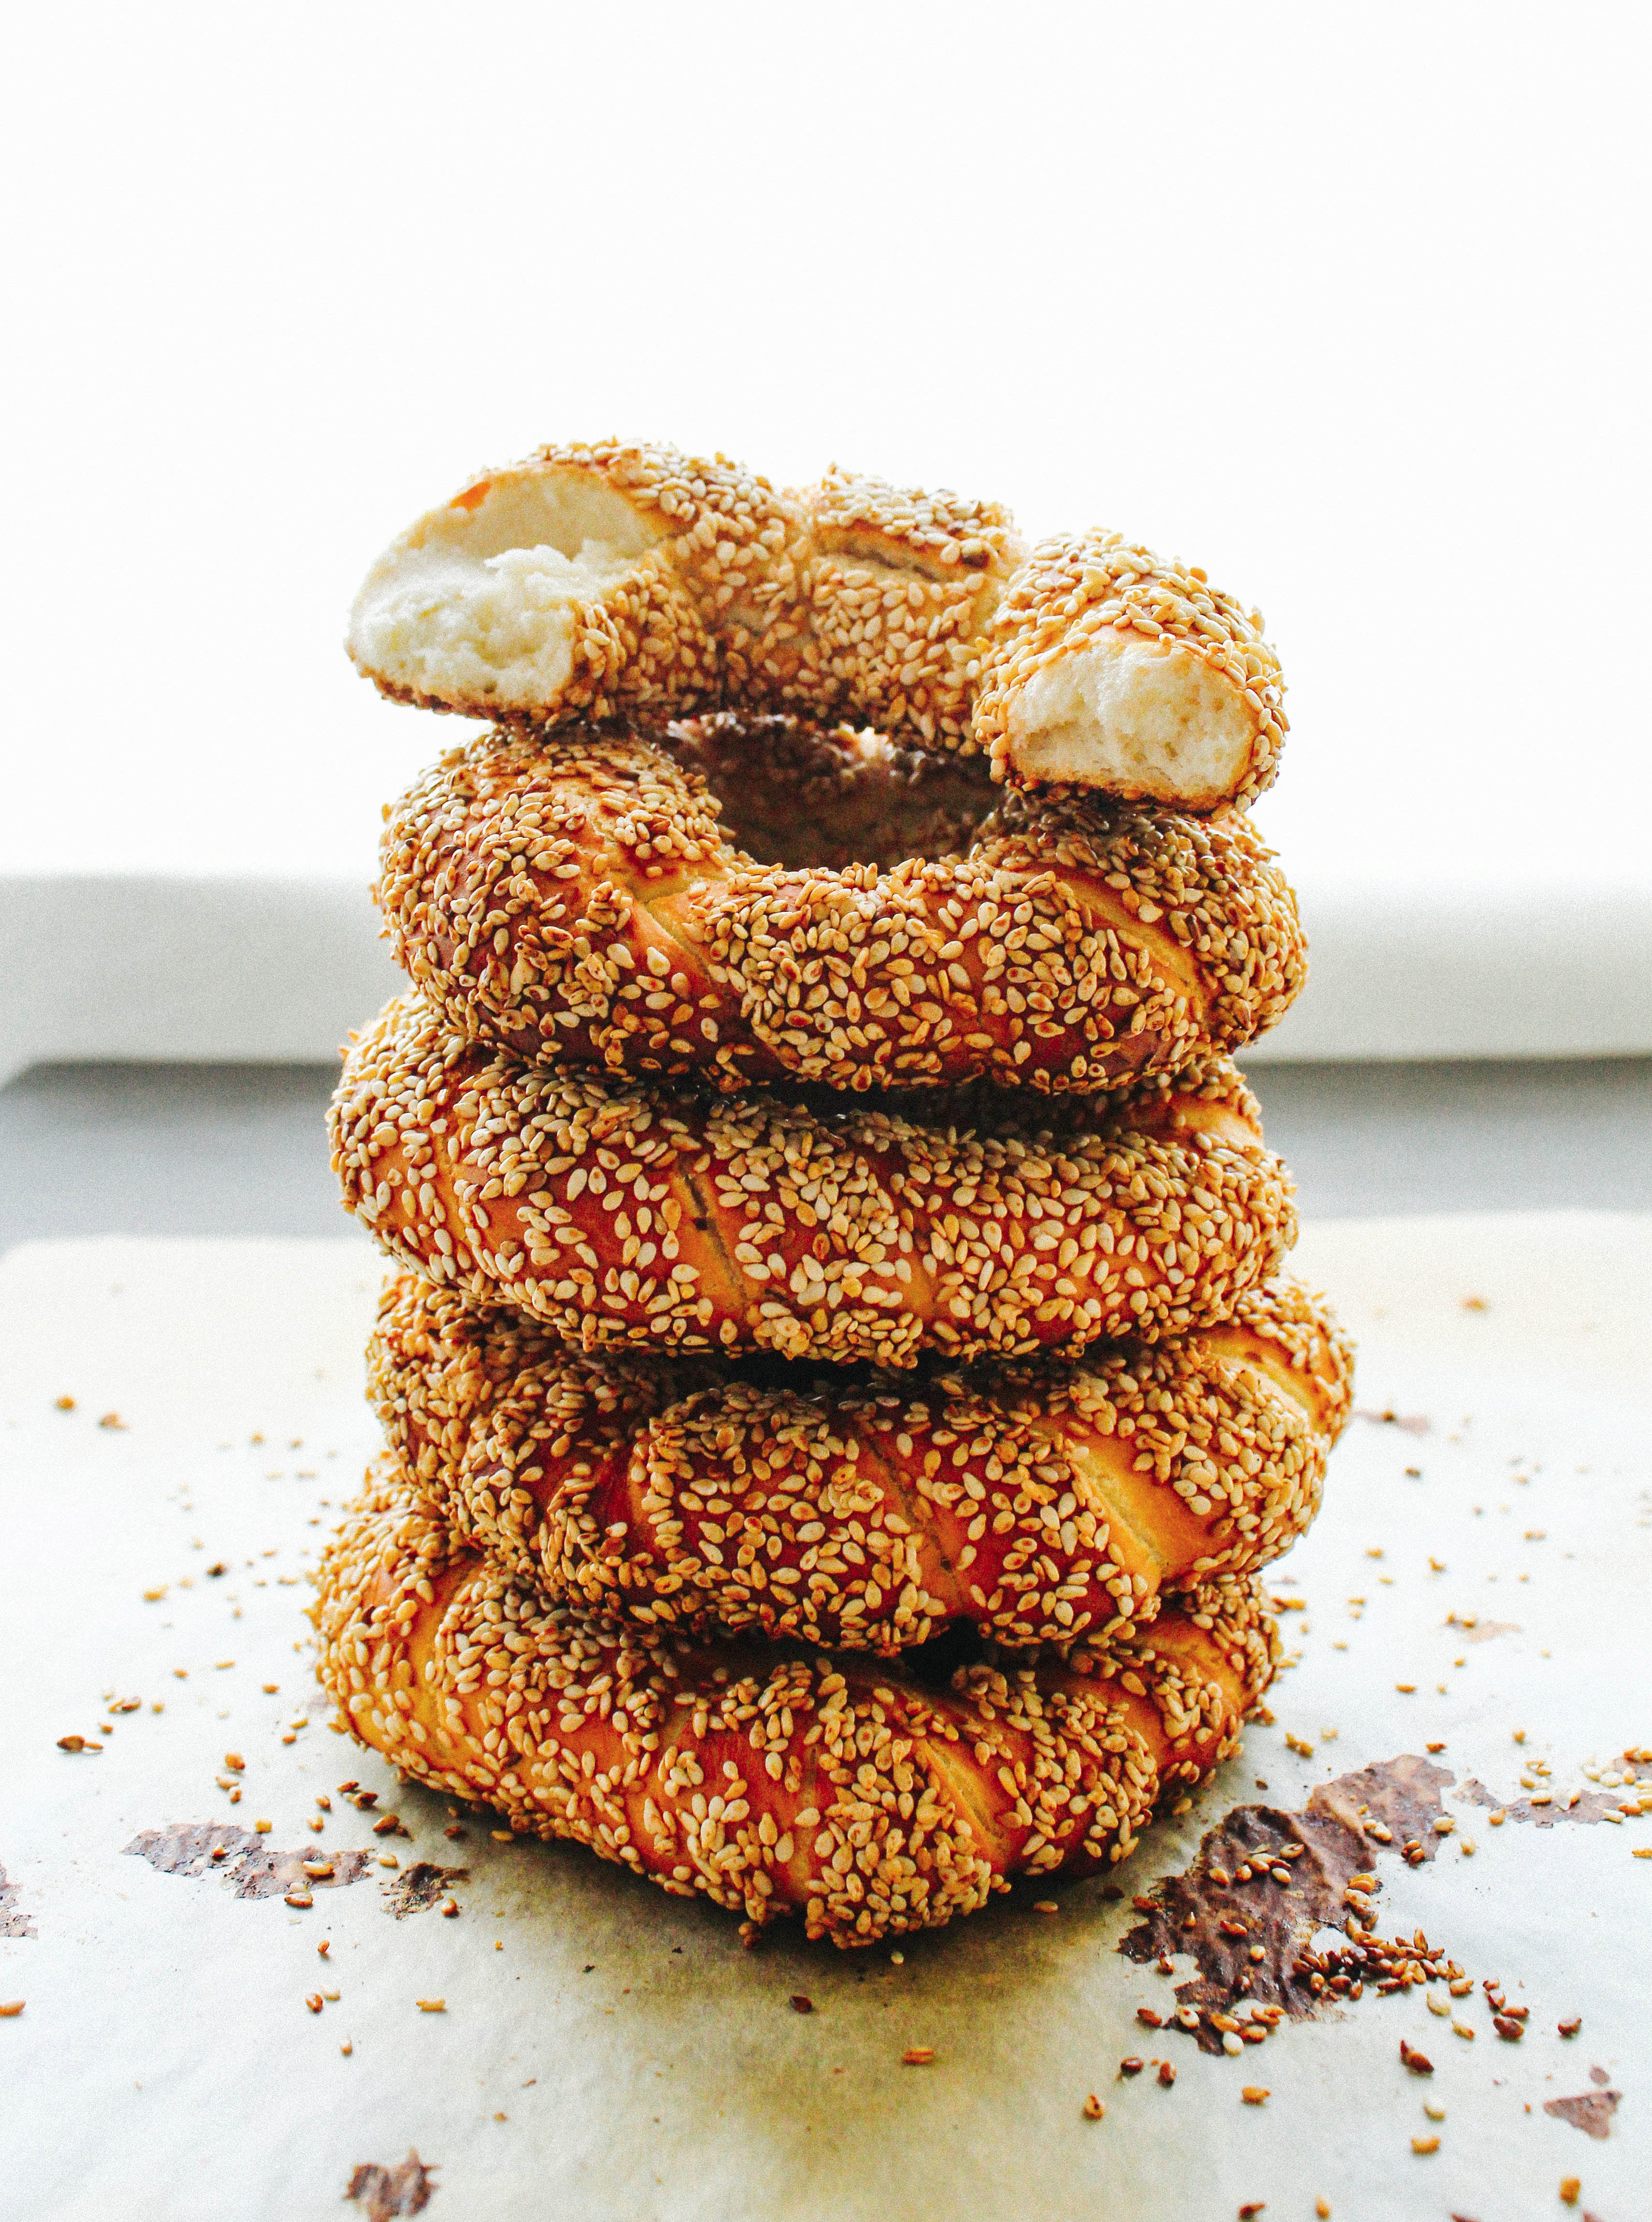
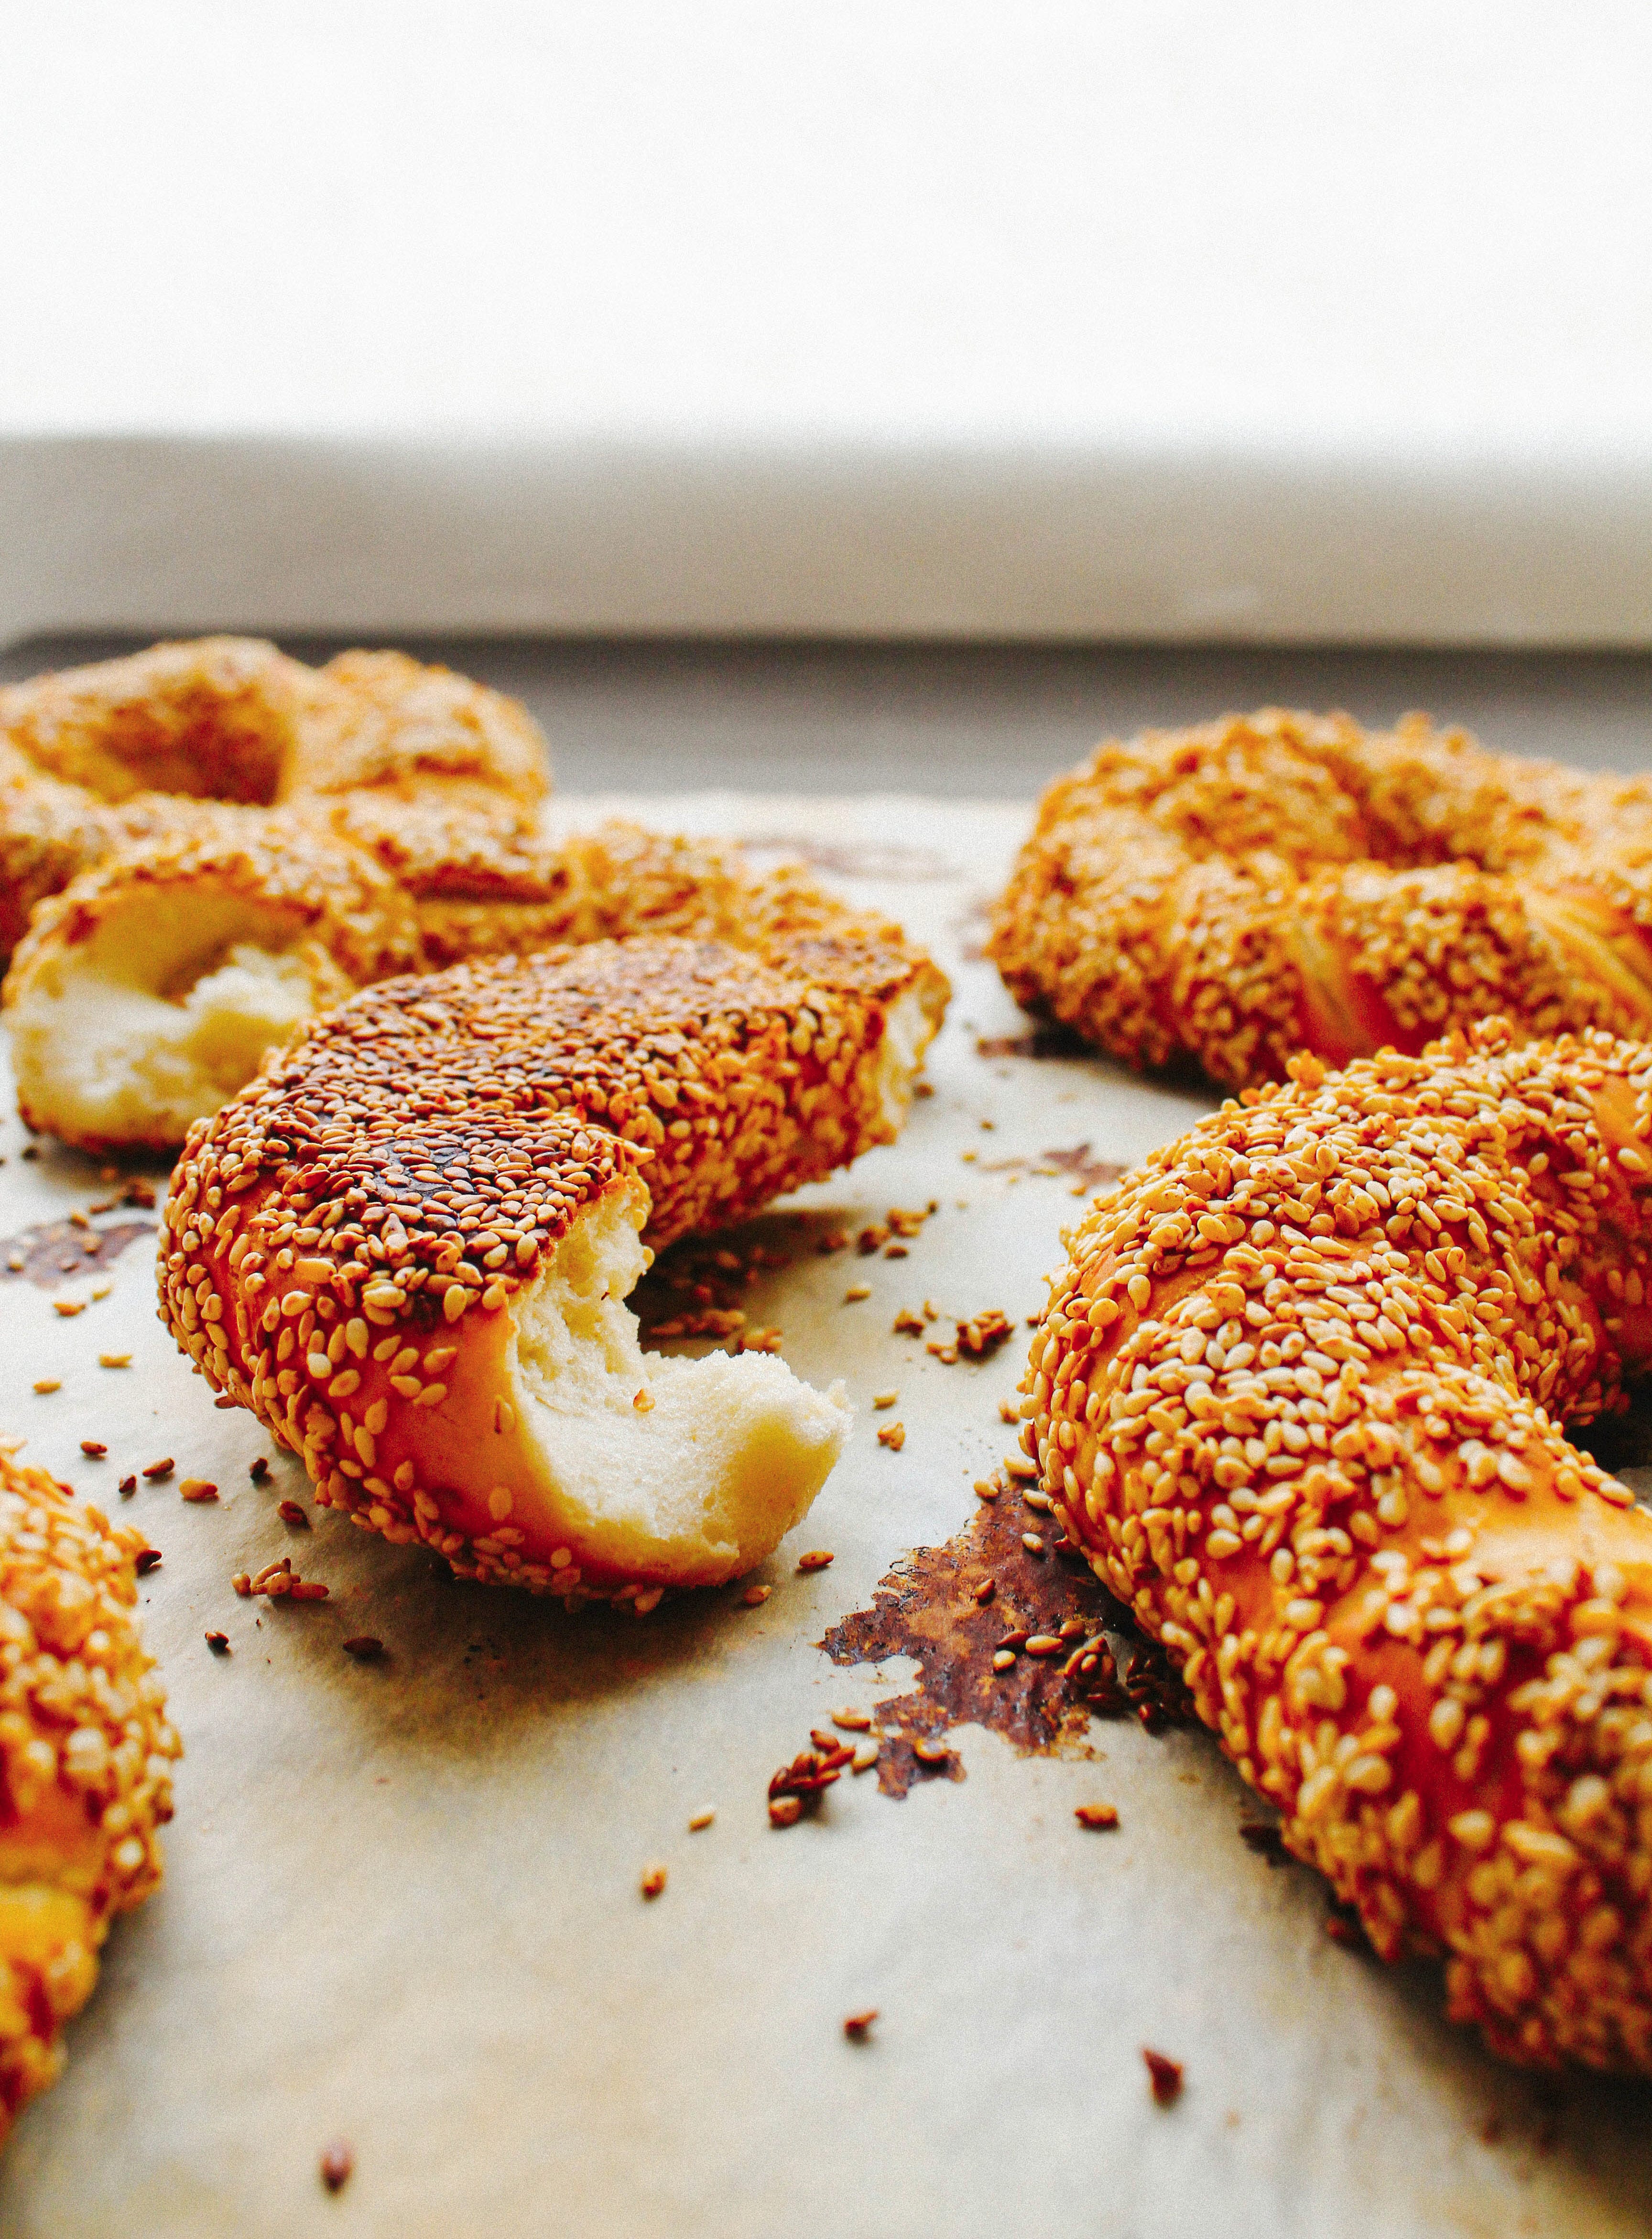
Simitia are characteristically crunchy on the outside and soft and slightly chewy on the inside and even though they are a traditional Greek breakfast snack, you can serve them any other time of the day. Let me assure you, no one will complain.
Greek Politiko Simiti / Koulouri (Braided Bread Rings Coated with Grape-Must Syrup and Sesame Seeds)
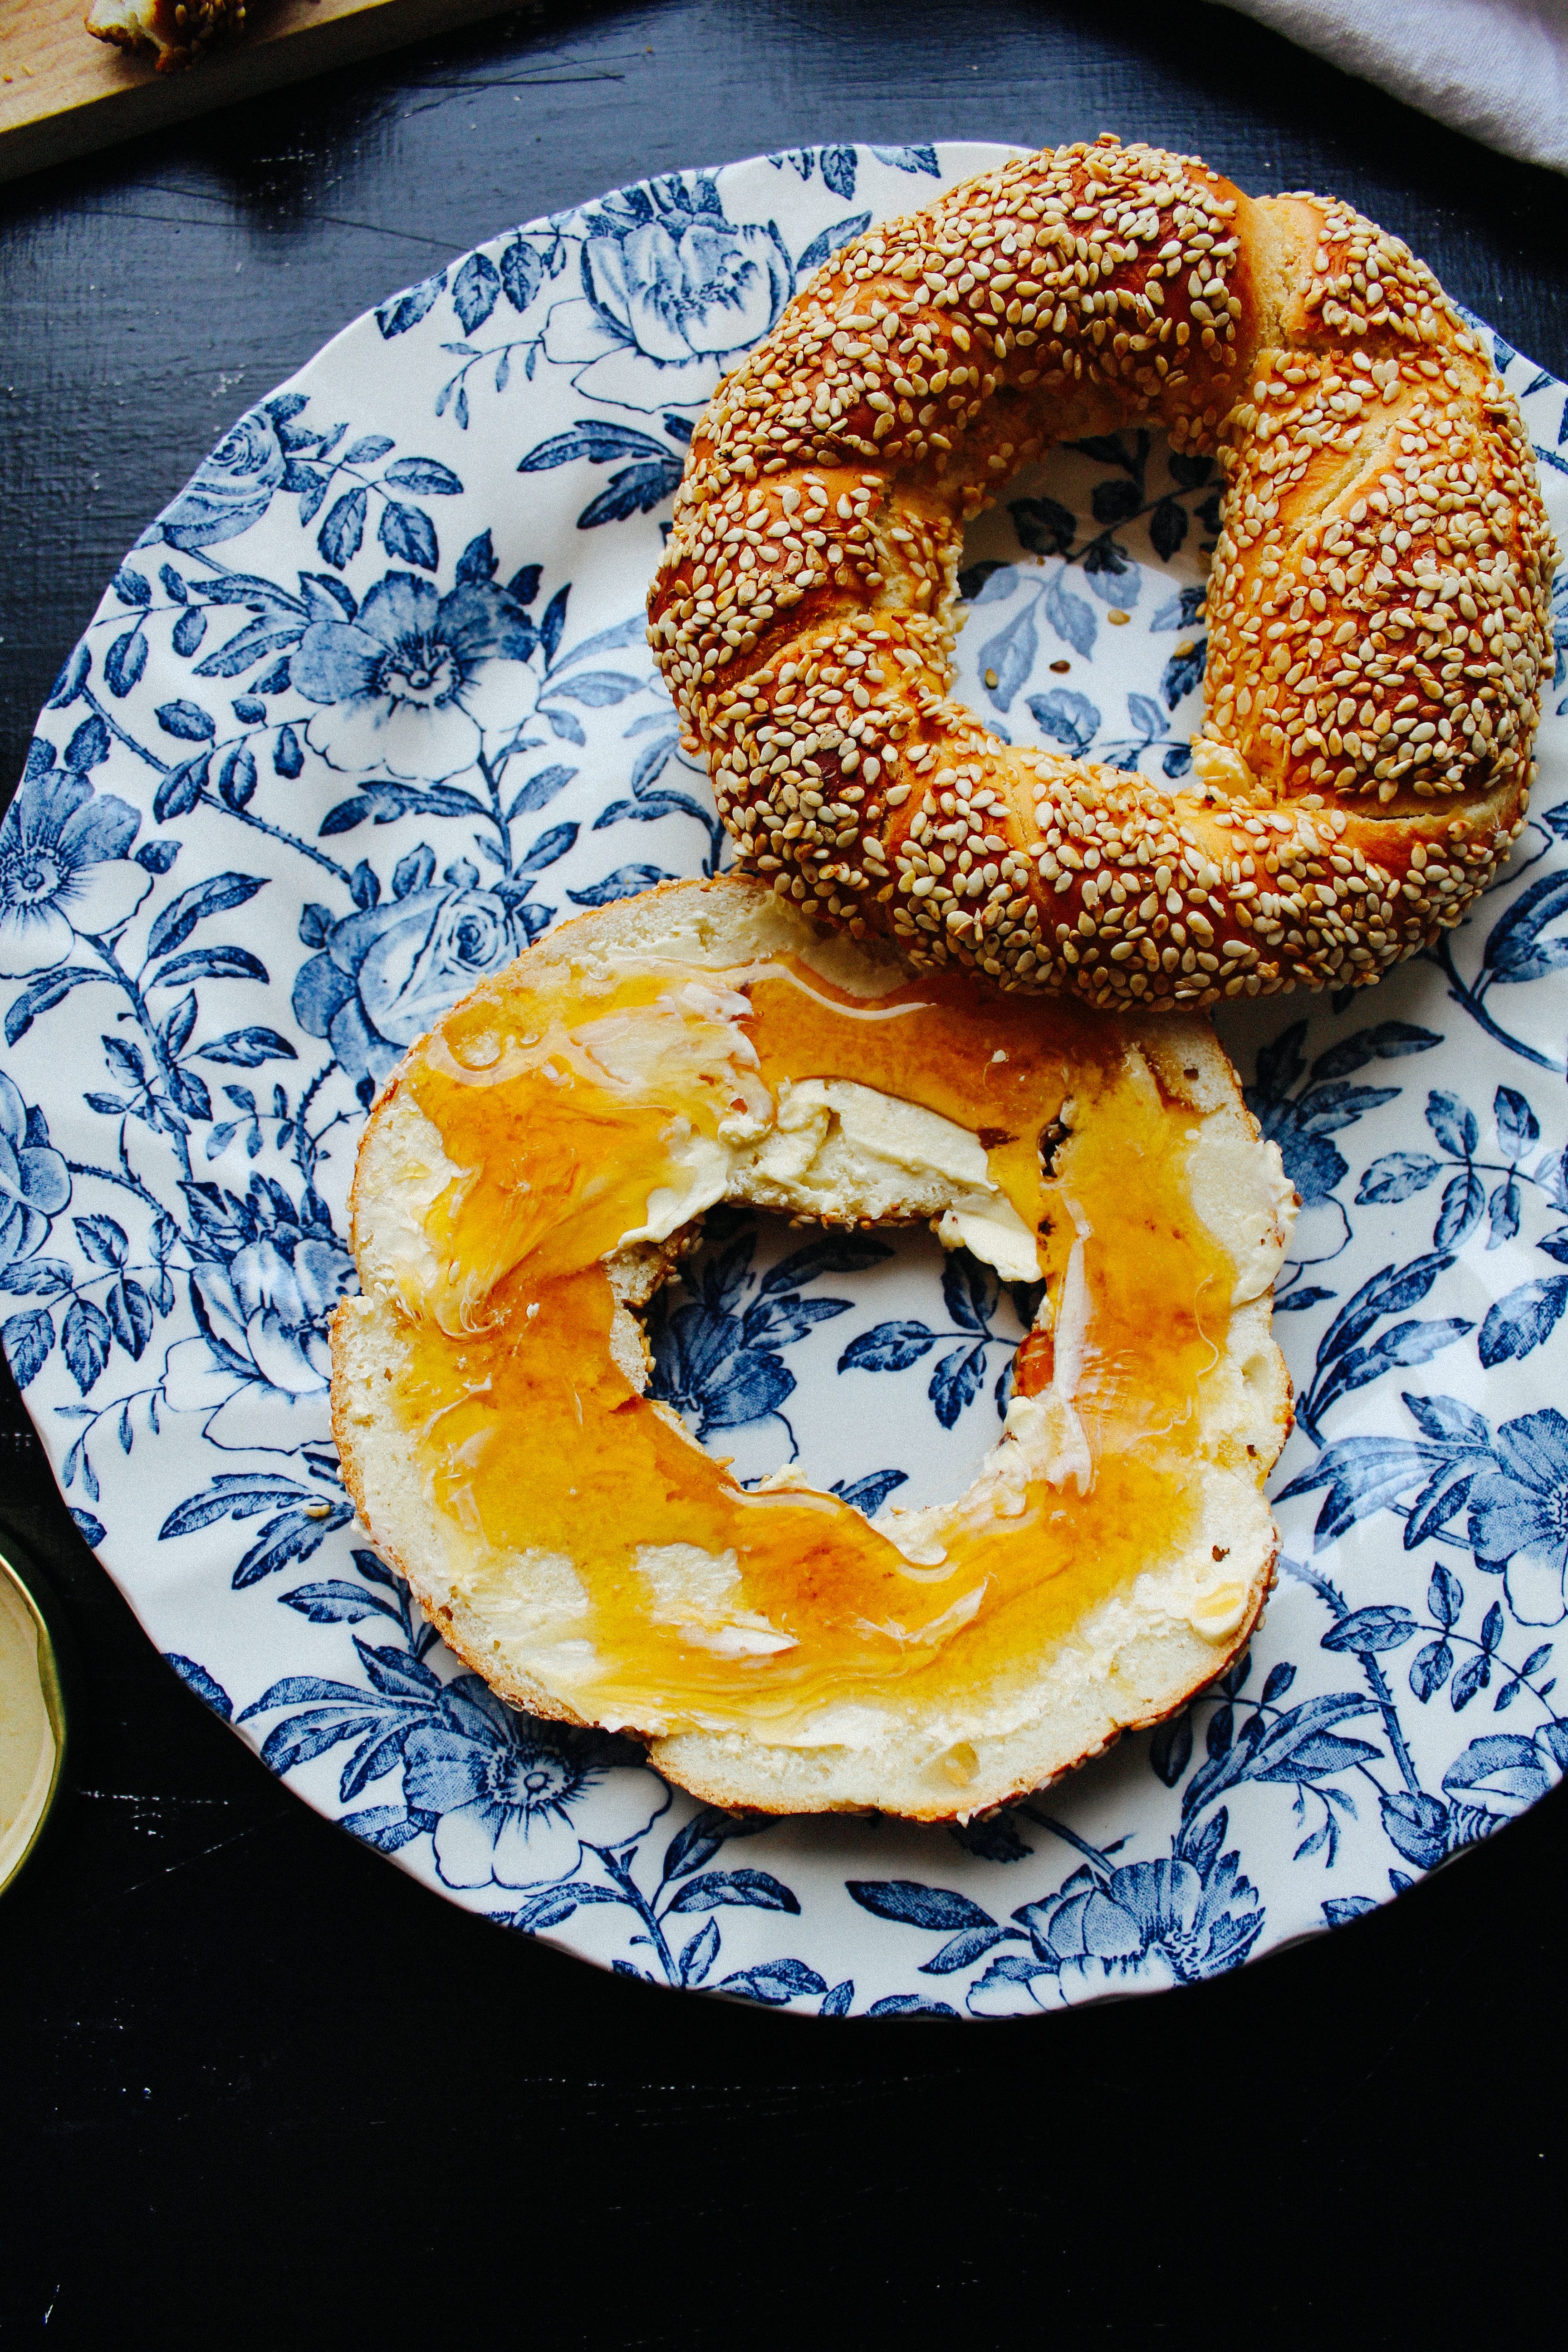
Simitia/koulouria can be served either with sweet or savory accompaniments. I love cutting them in half crosswise, spreading a generous amount of butter on top, followed by some honey or jam, and having them for breakfast. Served with Kalamata olives and Feta or Graviera cheese they make the perfect light lunch.
You can find grape-must syrup (petimezi) in Greek or Middle-Eastern stores. If you can't find it, simply coat the bread rings with water before covering them with the toasted sesame seeds.
Yield: 10 simitia/koulouria
Ingredients
for the dough
11 g (3 tsp) dried instant yeast
220 ml plus 30 ml (2 Tbsp) lukewarm water
30 g (2 Tbsp) caster sugar
650 g all-purpose flour
1 large egg
30 ml (2 Tbsp) olive oil plus extra for oiling the bowl
100 ml lukewarm fresh whole milk
8 g (1 tsp) salt
for the coating
1½ cups sesame seeds
⅓ cup grape-must syrup (petimezi) diluted in ¼ cup water
Special equipment: mixer with dough hook attachment (optional), one or two baking sheets, baking paper
Preparation
In the bowl of your stand mixer (or in a large bowl), add the yeast and the 2 Tbsp (30 ml) of lukewarm water. Massage the yeast with your fingertips into a paste and then add the sugar, the rest of the water, the flour, the egg, the olive oil, the milk and the salt, in that order.
Note: Be careful not to add the salt on top of the yeast but on top of the flour. If the salt comes in direct contact with the yeast, it will kill it and your dough will not rise.
Attach the dough hook and knead for about 7 minutes, on the lowest speed, until the dough no longer sticks to the sides of the bowl and it is smooth and elastic. If you're kneading by hand, take the dough out of the bowl and onto a clean surface and knead well. It'll take about 10 minutes. What you're aiming for is a soft and pliable dough that's ever-so-slightly moist but that is not sticking to your hands.
Note: Not all flours are the same, so if your dough is very wet, don't be afraid to add more flour. Add a little at a time though, testing the consistency of the dough. You don't want to end up with a stodgy, stiff dough.
If you're using a mixer for kneading the dough, turn out the dough onto a clean and lightly floured surface and shape it into a ball.
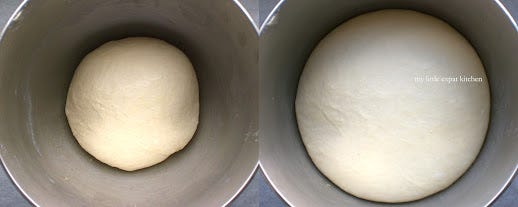
Lightly grease the bowl of your stand mixer (or a large bowl) with olive oil and place the ball of dough inside. Cover the bowl with plastic wrap and place it in a warm place, allowing the dough to proof and double in size. It will take about 45 minutes to proof, depending on how warm the room you leave it in is.
During the winter, I always leave my dough next to a working radiator. Not on top of it but on a chair and right in front of it.
In the meantime, toast the sesame seeds. In a large frying pan, add the sesame seeds and toast them over medium heat, stirring them around constantly with a spatula or wooden spoon, until they take on a light brown color and start releasing their aroma. Be careful not to burn them because they'll have a bitter taste.
Prepare your baking sheet/-s by lining the bottom with a piece of baking paper. Depending on how large your oven is, you can bake the simitia in one batch of 10 or two batches of 5. I bake mine in two batches.
Place the toasted sesame seeds and the petimezi that's been diluted in water in two separate, medium-sized and deep plates.
Preheat your oven to 200 degrees Celsius / 390 Fahrenheit.
Once the dough has proofed, take it out of the bowl and knead it for a couple of seconds just to deflate it a bit. Divide the dough into 10 equal pieces (100-110 g each) and shape them into 10 balls. Take each ball of dough and roll it on a lightly floured surface into a 70 cm-long rope.


Note: Don't flour your work surface too much because you need friction in order to shape the balls into ropes.
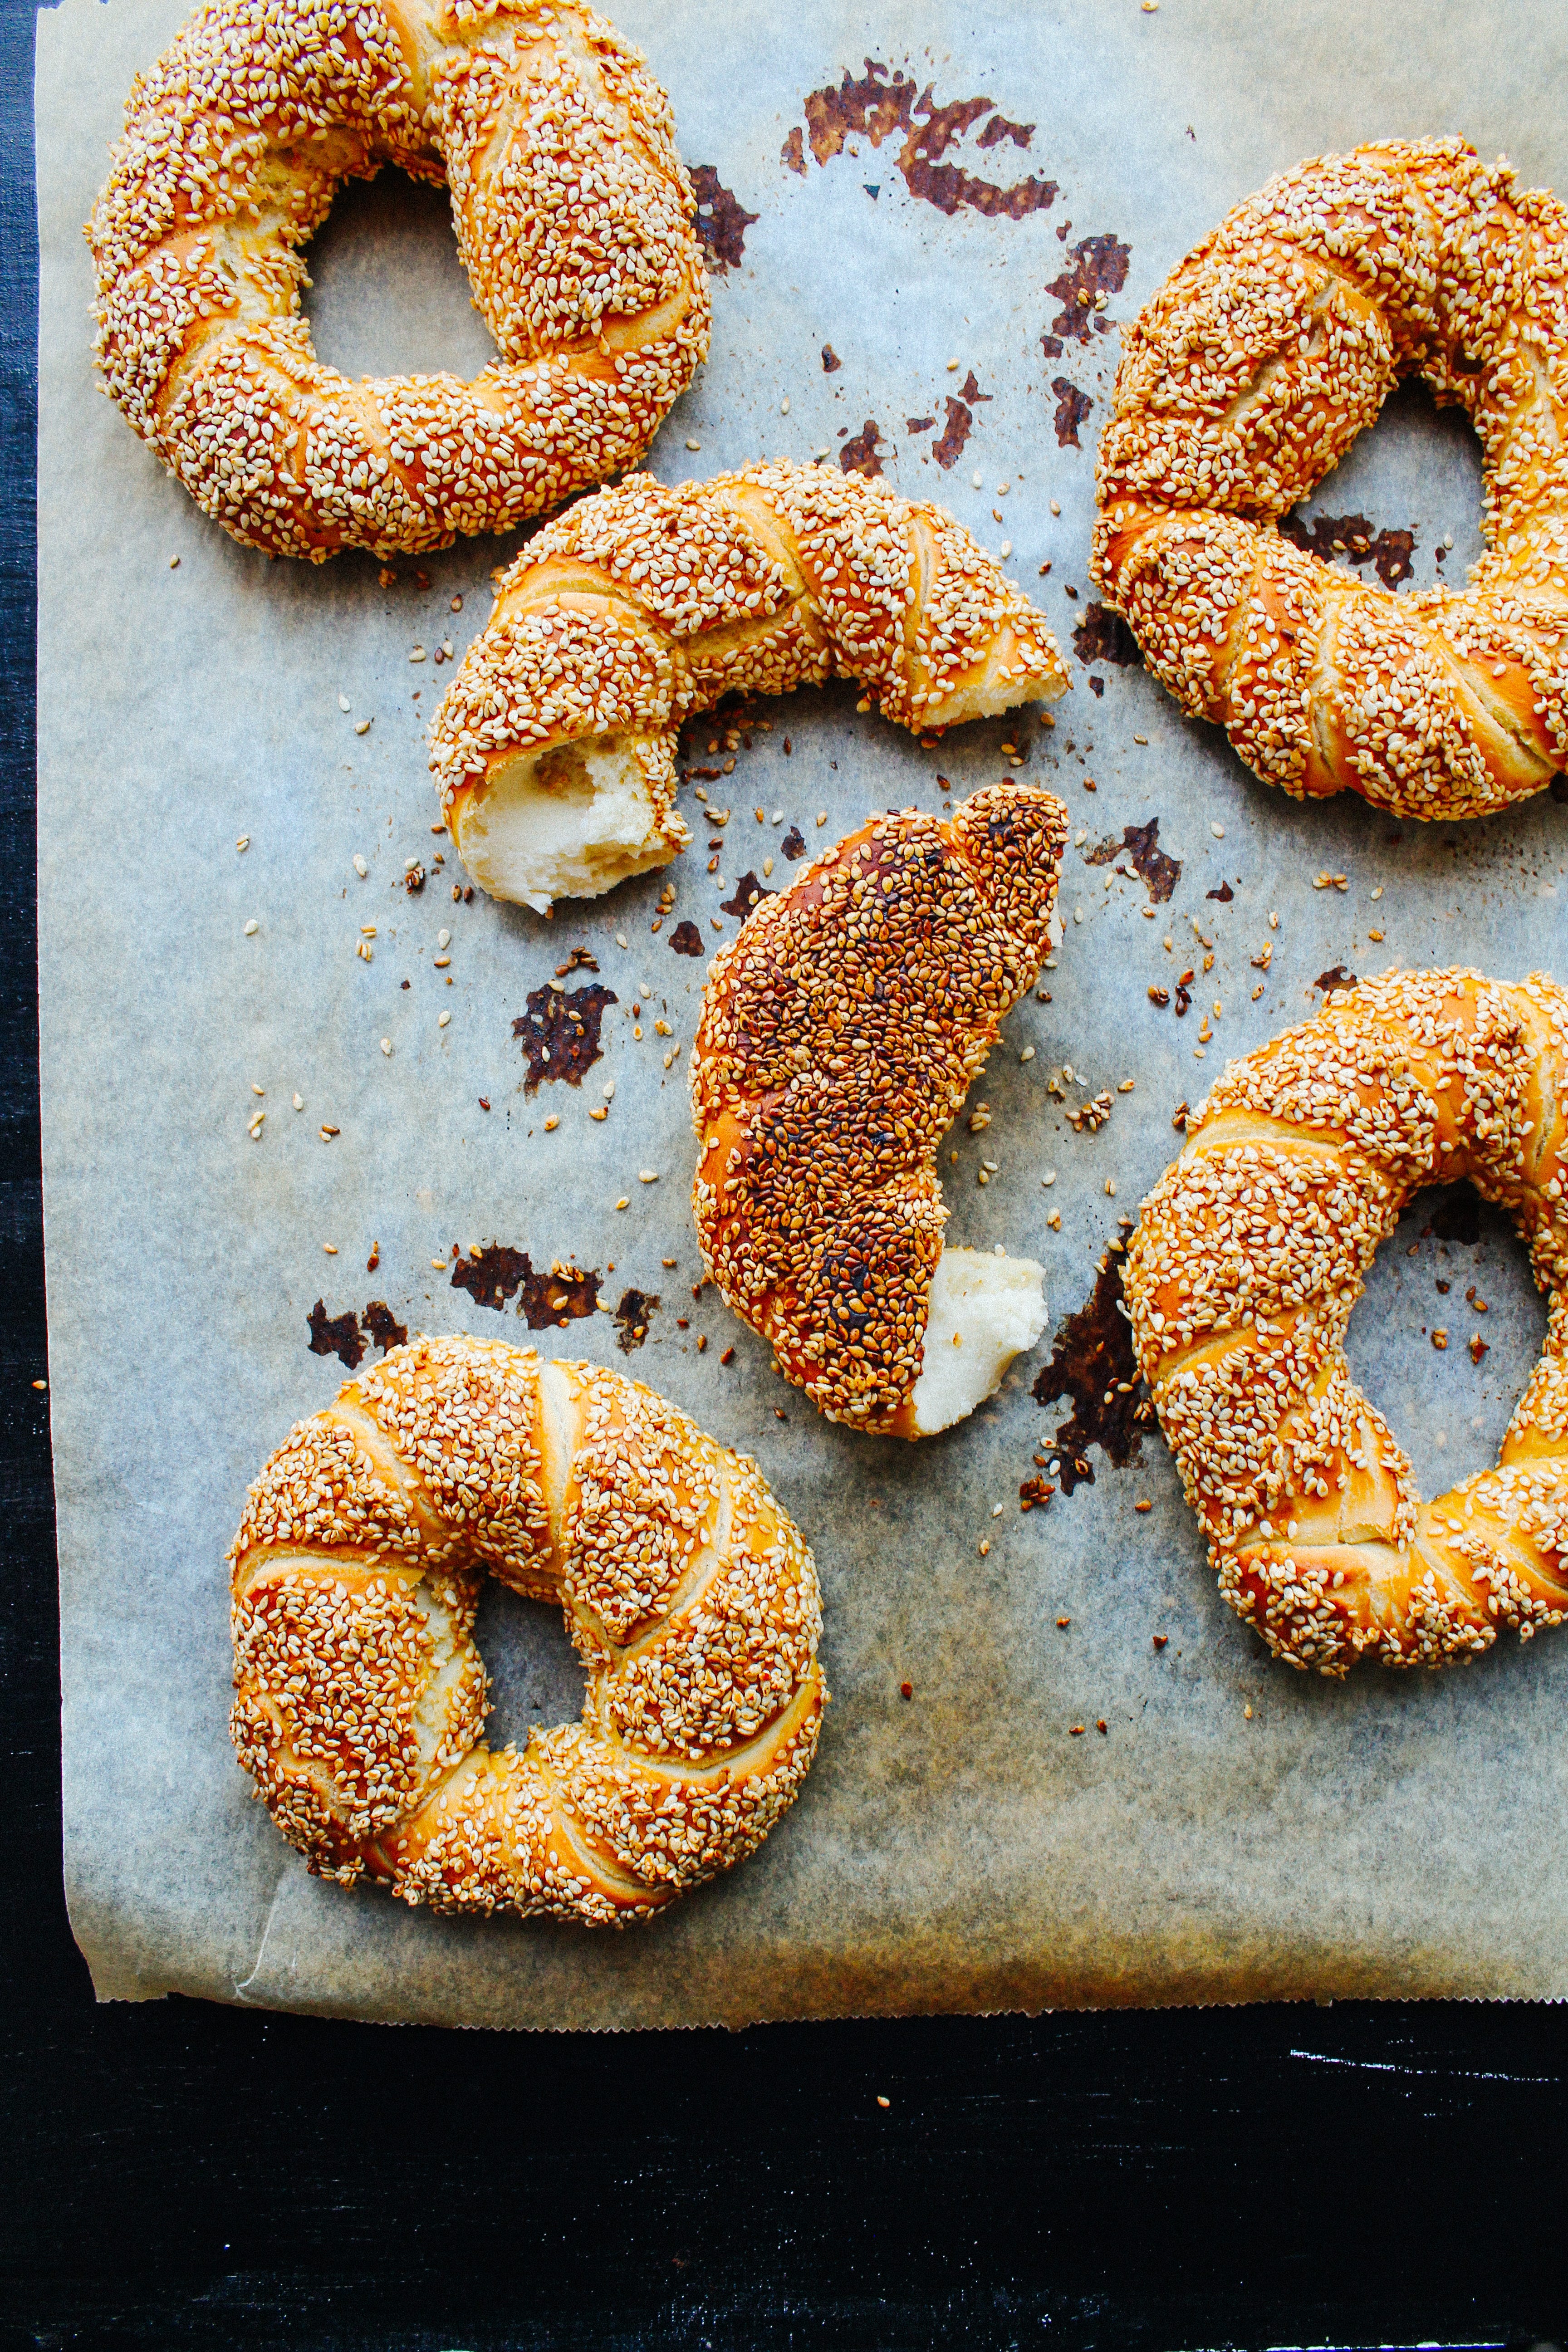
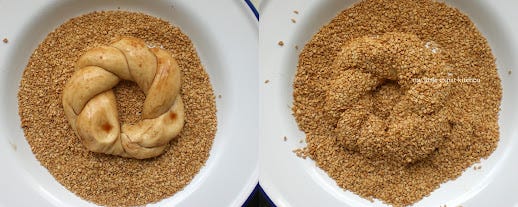
Bring the two ends of the rope together and braid the two strands (see photos for reference). Then, form a ring and press the edges together to seal. You can use a little bit of water to make the ends stick.
(In case you prefer your simiti a little thinner and with a bigger hole in the middle, roll the ball of dough into a longer and thinner rope than the 70 cm one, or roll it into two shorter and thinner ropes, about 50 cm-long each, and braid them).
Place the simiti on the baking sheet and continue rolling the other balls of dough.
Once you have prepared all your simitia (or half of them if you're baking them in two batches), take each one and first dip it in the petimezi and water mixture, coating it well on all sides and then immediately dip it in the sesame seeds, coating it thickly on all sides. Then return each simiti to your baking sheet. Continue doing the same with the rest. Don't place the simitia too close together on the baking sheet because they'll rise while baking.
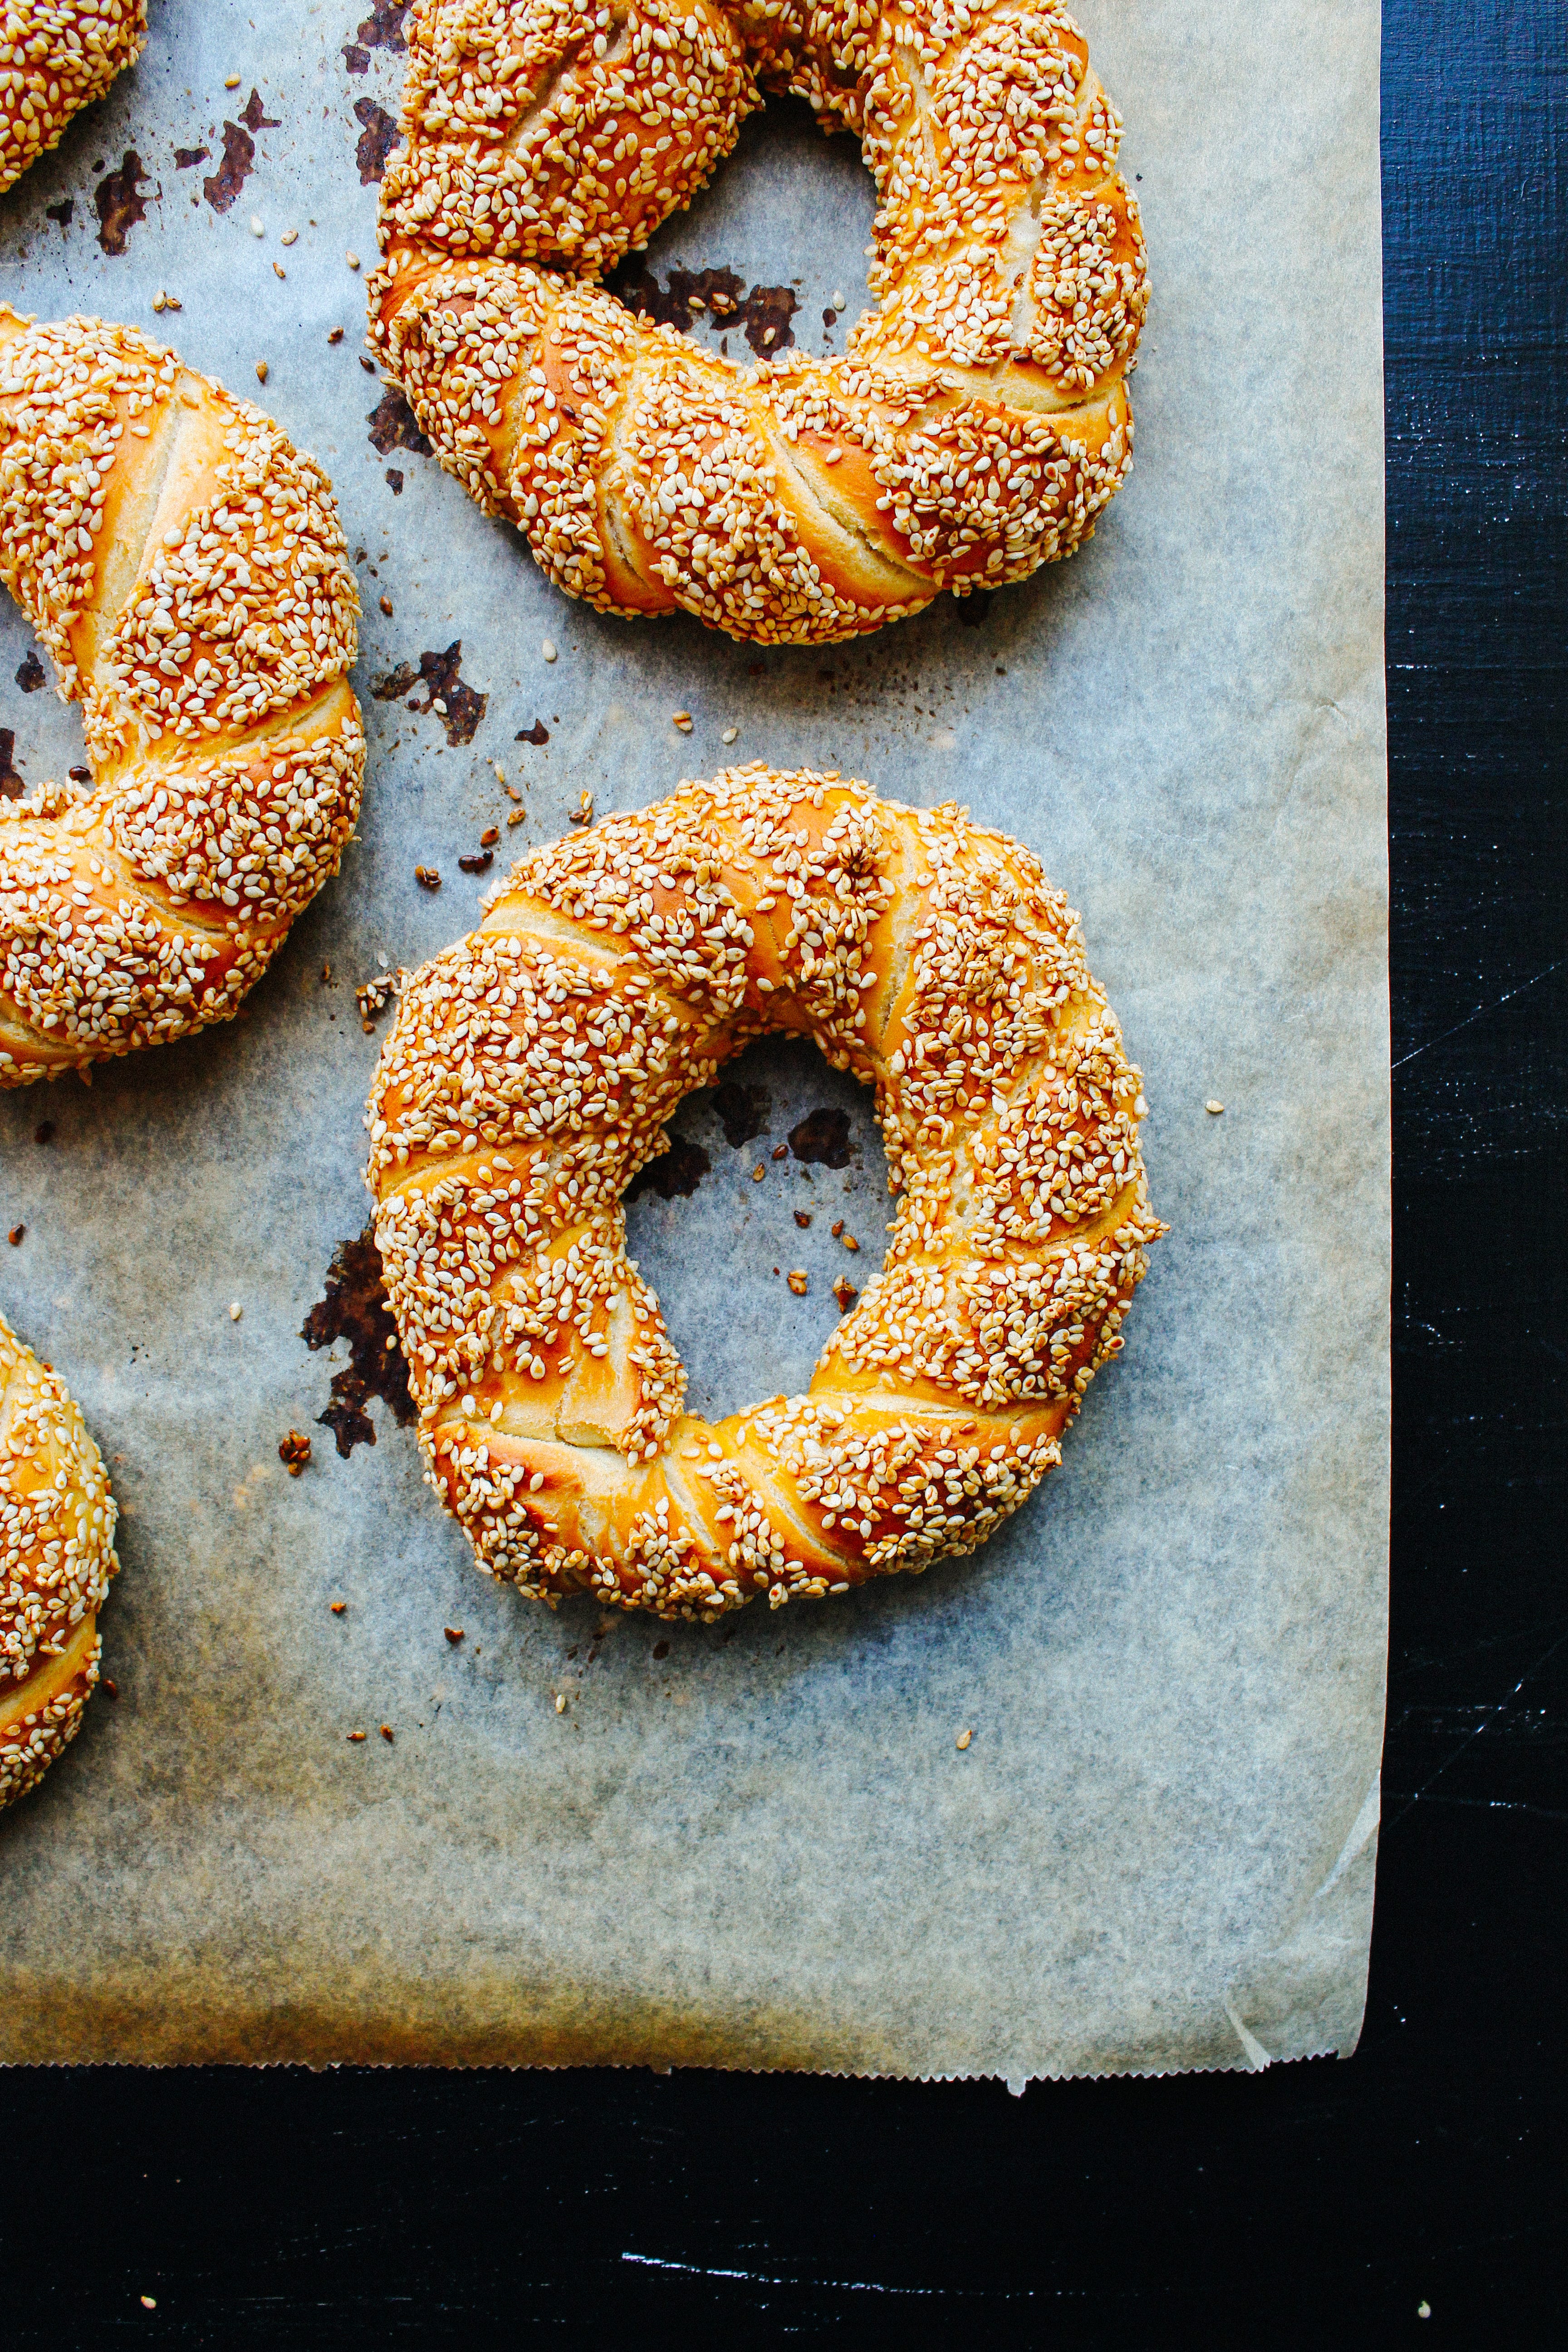
Place the baking sheet on the middle rack of the preheated oven and bake the simitia for about 20 minutes, until they take on a golden-brown color.
Take the first batch out of the oven and continue baking the second batch.
Place the baked simitia on a wire rack and eat them while still warm or when they have completely cooled.
You can keep them for a couple of days, covered lightly with a clean kitchen towel, but as with all baked goods and bread in particular, they're at their best on the day you bake them.
Όποιος έχει βρεθεί ποτέ στους δρόμους του κέντρου της Αθήνας νωρίς το πρωΐ, ξέρει ν' αναγνωρίζει εκείνη τη δελεαστική μυρωδιά που σου έρχεται καθώς στρίβεις ανυποψίαστος μια γωνία και μπροστά σου εμφανίζεται το παραγεμισμένο τελάρο του κουλουρτζή.
Εκείνη τη μυρωδιά που ακόμα κι αν δεν θες, σε κάνει να σταματάς και να κοιτάς τα κουλούρια με βλέμμα αχόρταγο. Ναι, εμείς οι Έλληνες μπορεί να μην είμαστε του πρωϊνού, κι εγώ ειδκά δεν είμαι καθόλου, αλλά μπροστά σ' ένα τέτοιο θέαμα, οι αντιστάσεις σου πέφτουν στο μηδέν κι η λαιμαργία καταφέρνει να σε κυριεύσει.
Πριν έρθω στην Ολλανδία, η σκέψη του να φτιάξω σπιτικά κουλούρια Θεσσαλονίκης δεν περνούσε ποτέ απ' το μυαλό μου. Ήταν δεδομένο ότι μπορούσα να τα βρω παντού. Τώρα όμως τα πράγματα έχουν αλλάξει. Τώρα, όταν λαχταράω οτιδήποτε ελληνικό, πρέπει να το φτιάξω μόνη μου, αλλιώς δεν υπάρχει περίπτωση να το γευτώ.
Τα σιμίτια ή κουλούρια δεν τα βρίσκει κανείς μονάχα στους δρόμους των ελληνικών μεγαλουπόλεων αλλά και σ' αυτούς της γειτονικής Τουρκίας. Ήρθαν στη χώρα μας από Έλληνες Μικρασιάτες και Κωνσταντινουπολίτες πρόσφυγες που εγκαταστάθηκαν στη Θεσσαλονίκη, εξού και η κοινή ονομασία τους "Κουλούρια Θεσσαλονίκης".
Παρεμπιπτόντως, χάρη στον κύριο Μπαμπινιώτη ανακάλυψα ότι η ελληνική λέξη 'σιμίτι' προέρχεται από την τουρκική λέξη 'simit', η οποία προέρχεται από την αραβική λέξη 'semid', η οποία με τη σειρά της προέρχεται από την αρχαία ελληνική λέξη 'σεμίδαλις', δηλαδή σιμιγδάλι.
Το κλασικό ελληνικό κουλούρι είναι ένα λεπτό δαχτυλίδι ψωμιού επικαλυμμένο με σουσάμι, αυτό όμως που εγώ προτιμώ να φτιάχνω και να τρώω είναι το Πολίτικο σιμίτι (μπορείτε να διαβάσετε εδώ για τη σχέση μου με την Πολίτικη κουζίνα). Το Πολίτικο σιμίτι προέρχεται από τους Έλληνες φουρναραίους της Κωνσταντινούπολης και είναι ένα πλεχτό σαν κοτσίδα και στρουμπουλό κουλούρι, το οποίο πρώτα βουτάται μέσα σε πετιμέζι που του χαρίζει μια ανεπαίσθητη γλύκα κι έπειτα τυλίγεται σε καβουρντισμένο σουσάμι.
Η πλεξούδα δημιουργεί μια πιο πολύπλοκη υφή και κατ' επέκταση μια πιο ενδιαφέρουσα γεύση, καθώς το πετιμέζι τρυπώνει ανάμεσα στις πλέξεις και καραμελώνει όταν το σιμίτι ψηθεί στο φούρνο. Το καβουρντισμένο σουσάμι χαρίζει μια έντονη, γήινη χροιά και η προσθήκη αβγού και γάλακτος στη ζύμη, μια ακόμα διαφορά από το κλασικό κουλούρι, του προσδίδει μια πιο πλούσια και γεμάτη γεύση.
Υπέροχα τραγανό απ' έξω κι αφράτο και μαλακό από μέσα με μια ελαφρώς μαστιχωτή υφή, αυτό το παραδοσιακό ελληνικό σνακ μπορεί να είναι ιδανικό για τις πρωϊνές λιγούρες αλλά πιστέψτε με, αν το προσφέρετε σε κάποιον οποιαδήποτε άλλη ώρα της ημέρας, δεν πρόκειται να παραπονεθεί.
Πολίτικα Σιμίτια / Κουλούρια
Τα σιμίτια μπορούν να έχουν γλυκά ή αλμυρά συνοδευτικά. Κόβοντάς τα στη μέση κατά πλάτος κι απλώνοντας βούτυρο και μέλι ή μαρμελάδα, είναι ό,τι πρέπει για πρωϊνό. Μαζί με λίγο τυρί φέτα ή γραβιέρα και μερικές ελιές Καλαμών, αποτελούν το τέλειο γρήγορο γεύμα.
Σας προτρέπω να μην παραλείψετε το πετιμέζι στη συνταγή, σε περίπτωση όμως που δεν μπορείτε να βρείτε πετιμέζι, περάστε τα κουλούρια με λίγο νερό πριν τα καλύψετε με σουσάμι.
Μερίδες: 10 σιμίτια
Υλικά
για τη ζύμη
11 γρ. (3 κουταλάκια γλυκού) ξηρή μαγιά
220 ml συν 30 ml (2 κουταλιές σούπας) χλιαρό νερό
30 γρ. (2 κουταλιές σούπας) ψιλή ζάχαρη
650 γρ. αλεύρι για όλες τις χρήσεις
1 μεγάλο αβγό
30 ml (2 κουταλιές σούπας) ελαιόλαδο συν έξτρα για το λάδωμα του μπωλ
100 ml χλιαρό φρέσκο γάλα, πλήρες
8 γρ. (1 κουταλάκι γλυκού) αλάτι
για την επικάλυψη
1½ κούπα σουσάμι
⅓ κούπας πετιμέζι αραιωμένο σε ¼ κούπας νερό
Ειδικά εργαλεία: μίξερ με εξάρτημα γάντζο (προαιρετικά), ένα ή δυο λαμαρίνες, λαδόκολλα
Προετοιμασία
Στο μπωλ του μίξερ βάσης (ή σε ένα μεγάλο μπωλ), προσθέστε τη μαγιά και τις 2 κουταλιές (30 ml) χλιαρό νερό. Τρίψτε τη μαγιά με τα δάχτυλά σας μέσα στο νερό μέχρι να γίνει σαν πάστα και προσθέστε τη ζάχαρη, το υπόλοιπο χλιαρό νερό, το αλεύρι, το αβγό, το ελαιόλαδο, το χλιαρό γάλα και το αλάτι, με αυτή τη σειρά
Σημείωση: Μην ρίξετε το αλάτι πάνω στη μαγιά αλλά πάνω στο αλεύρι. Όταν το αλάτι έρχεται σε άμεση επαφή με τη μαγιά, την σκοτώνει και η ζύμη δεν φουσκώνει.
Ξεκινήστε το μίξερ σας και ζυμώστε για περίπου 7 λεπτά, σε χαμηλή ταχύτητα, μέχρι η ζύμη να είναι λεία κι ελαστική. Αν ζυμώνετε με το χέρι, αδειάστε τη ζύμη σε μια καθαρή επιφάνεια και ζυμώστε καλά. Θα πάρει γύρω στα 10 λεπτά. Θέλετε η ζύμη σας να είναι μαλακιά κι αφράτη και να μην κολλάει στα χέρια ή στο μπωλ αλλά να παραμένει ελαφρώς υγρή.
Σημείωση: Δεν είναι όλα τα αλεύρια ίδια, οπότε σε περίπτωση που η ζύμη σας κολλάει πολύ στα χέρια ή στον κάδο του μίξερ, μη φοβηθείτε να ρίξετε επιπλέον αλεύρι. Ρίξτε το όμως σιγά-σιγά, ελέγχοντας την υφή της ζύμης ώστε να μην καταλήξετε με σφιχτό και ξερό ζυμάρι.
Αν χρησιμοποιείτε μίξερ για το ζύμωμα, αφαιρέστε τη ζύμη απ' το μπωλ, ακουμπήστε την σε μια επιφάνεια καθαρή κι ελαφρώς αλευρωμένη και σχηματίστε την σε μπάλα.
Λαδώστε ελαφρά τον πάτο και τα τοιχώματα του μπωλ του μίξερ βάσης (ή ενός μεγάλου μπωλ) με λίγο ελαιόλαδο και επιστρέψτε τη ζύμη μέσα στο μπωλ. Καλύψτε το μπωλ με πλαστική μεμβράνη και αφήστε το σε ζεστό μέρος μέχρι η ζύμη να διπλασιαστεί σε όγκο. Θα πάρει γύρω στα 45 λεπτά να φουσκώσει, αναλόγως πόσο ζεστός είναι ο χώρος που θ' αφήσετε τη ζύμη.
Τον χειμώνα, βάζω τη ζύμη κοντά στο καλοριφέρ. Όχι πάνω στο καλοριφέρ, αλλά πάνω σε μια καρέκλα και μπροστά του.
Εντωμεταξύ, καβουρντίστε το σουσάμι. Σε ένα μεγάλο τηγάνι, ρίξτε το σουσάμι και ζεστάνετε σε μέτρια φωτιά. Καβουρντίστε το, ανακατεύοντας συνεχώς με μια σπάτουλα ή κουτάλα, μέχρι να πάρει ένα ανοιχτό καστανό χρώμα και ν' αρχίσει να αναδίδει τα αρώματά του. Πρέπει να είσαστε προσεκτικοί γιατί το σουσάμι αρπάζει εύκολα και δεν θέλετε επουδενί να σας καεί διότι θα πικρίσει.
Ετοιμάστε τη λαμαρίνα/-ες σας τοποθετώντας λαδόκολλα στον πάτο. Αναλόγως πόσο μεγάλος είναι ο φούρνος σας, μπορείτε να ψήσετε τα σιμίτια είτε σε μια φουρνιά των 10 είτε σε δυο φουρνιές των 5. Εγώ τα ψήνω σε δυο φουρνιές.
Βάλτε το αραιωμένο σε νερό πετιμέζι και το καβουρντισμένο σουσάμι σε δυο ξεχωριστά βαθιά πιάτα μεσαίου μεγέθους.
Προθερμάνετε το φούρνο σας στους 200 βαθμούς Κελσίου.
Μόλις φουσκώσει η ζύμη, βγάλτε την μέσα από το μπωλ και ζυμώστε την για μερικά δευτερόλεπτα για να ξεφουσκώσει. Χωρίστε την σε 10 ίσα κομμάτια (100-110 γρ. το καθένα) και σχηματίστε 10 μπάλες. Πάρτε μια μπάλα ζύμης και δουλεύοντας πάνω σε μια ελαφρώς αλευρωμένη επιφάνεια εργασίας, σχηματίστε ένα μακρύ κορδόνι γύρω στα 70 εκ.
Σημείωση: Μην αλευρώσετε πολύ την επιφάνεια εργασίας γιατί χρειάζεται να υπάρχει τριβή ώστε να μπορείτε να ανοίξετε τη ζύμη σε κορδόνι.
Ενώστε τις δυο άκρες του κορδονιού και στρίψτε το δημιουργώντας πλεξούδα (δείτε τις φωτογραφίες για αναφορά). Στη συνέχεια σχηματίστε ένα κουλούρι, ενώνοντας τις άκρες, πιέζοντάς τες καλά. Μπορείτε να βάλετε λίγο νερό για να κολλήσουν καλύτερα.
(Σε περίπτωση που θέλετε τα σιμίτια σας πιο λεπτά και με μεγαλύτερη τρύπα στη μέση, ανοίξτε τη μπάλα ζύμης σε πιο μακρύ και λεπτό κορδόνι ή φτιάξτε δυο πιο κοντά και λεπτά κορδόνια, γύρω στα 50 εκ. το καθένα αντί για ένα μακρύ των 70 εκ., κι ενώστε τα στρίβοντάς τα σε πλεξούδα).
Τοποθετήστε το σιμίτι στη λαμαρίνα και συνεχίστε με τα υπόλοιπα μπαλάκια ζύμης.
Μόλις έχετε ετοιμάσει όλα τα σιμίτια (ή τα μισά αν τα ψήσετε σε δυο φουρνιές), βουτήξτε τα ένα-ένα πρώτα στο αραιωμένο σε νερό πετιμέζι, φροντίζοντας να καλυφθούν καλά απ' όλες τις πλευρές, κι έπειτα βάζοντάς τα στο πιάτο με το σουσάμι, φροντίζοντας και πάλι να καλυφθούν καλά απ' όλες τις πλευρές. Έπειτα, επιστρέψτε το κάθε σιμίτι στη λαμαρίνα και συνεχίστε την ίδια διαδικασία και με τα υπόλοιπα. Μην τα τοποθετήσετε πολύ κοντά το ένα στο άλλο γιατί θα φουσκώσουν κατά το ψήσιμο.
Τοποθετήστε τη λαμαρίνα στο μεσαίο ράφι του προθερμασμένου φούρνου σας και ψήστε τα σιμίτια για 20 λεπτά περίπου, μέχρι να πάρουν ένα χρυσοκάστανο χρώμα.
Βγάλτε τα πρώτα σιμίτια απ' το φούρνο και συνεχίστε με το ψήσιμο της δεύτερης φουρνιάς.
Τοποθετήστε τα ψημένα σιμίτια σε μια σχάρα και απολαύστε τα ενώ είναι ακόμα ζεστά ή αφού κρυώσουν εντελώς.
Μπορείτε να τα κρατήσετε για 1-2 μέρες καλυμμένα ελαφρά με μια καθαρή πετσέτα κουζίνας αλλά όπως όλα τα φρέσκα αρτοσκευάσματα, είναι νοστιμότερα τη μέρα που θα τα φτιάξετε.
We love simitia! I've tried making them a few times, but they've never turned out quite right. Will definitely give it another try, thanks!